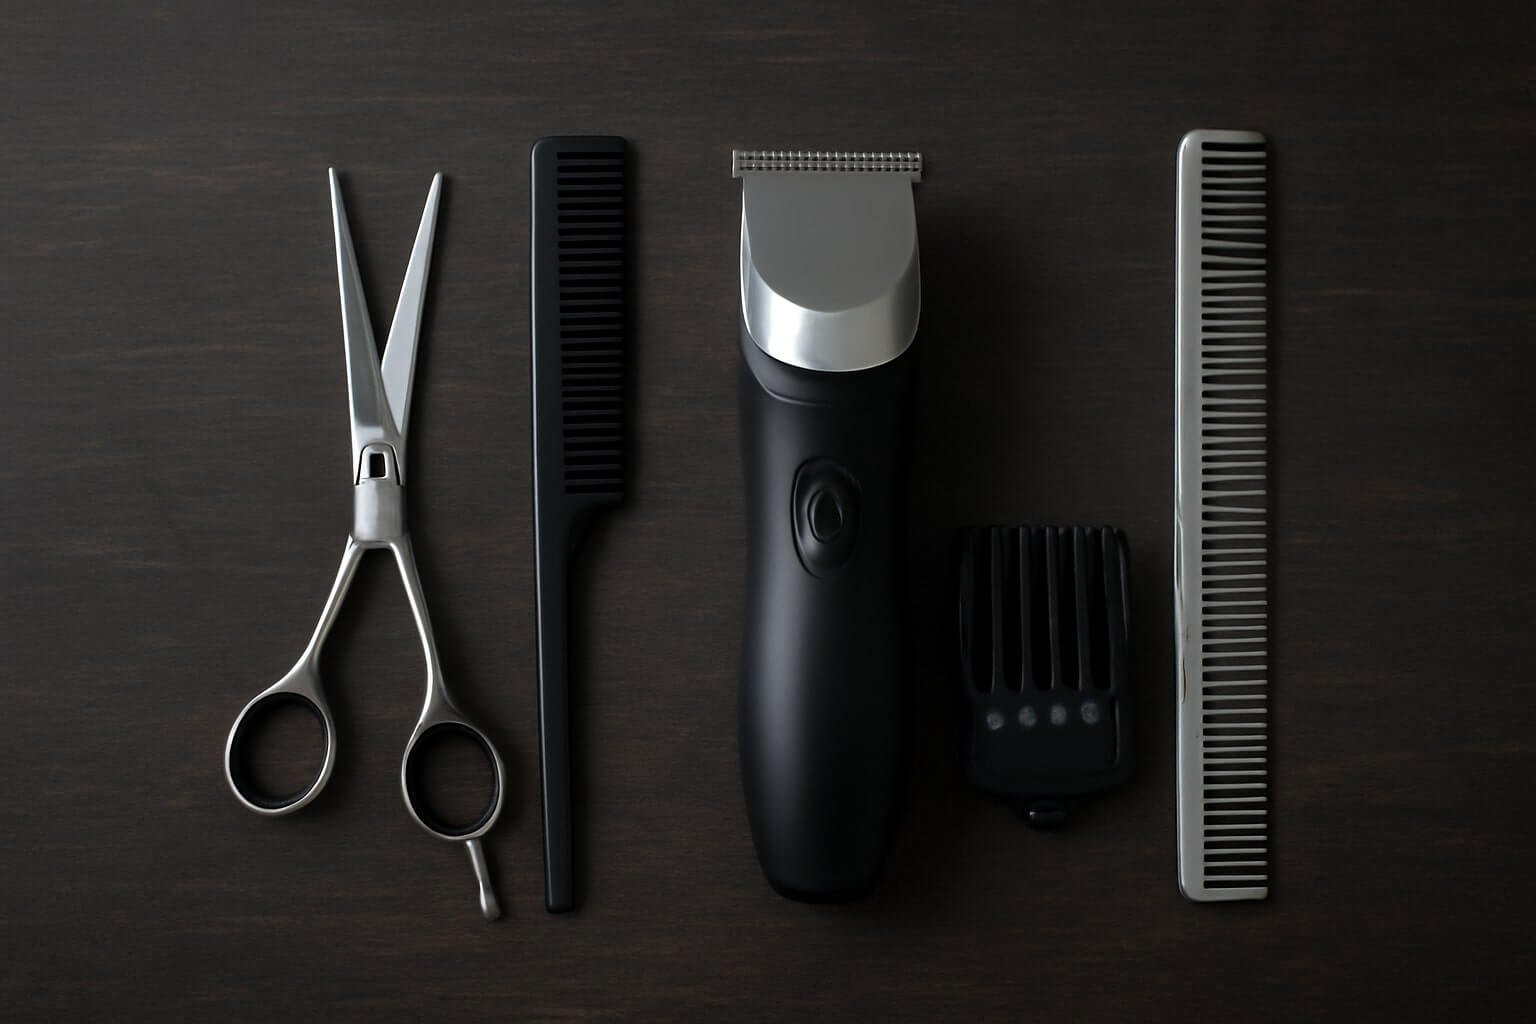
If you’re aiming for a clean high and tight, start with the right kit: sturdy clippers with key guards, a sharp trimmer for edging, and a foil shaver for that skin-close finish. Add 5.5–7 inch shears for blending, plus combs, clips, and a handheld mirror to check symmetry. Keep alcohol wipes, oil, and a brush ready to maintain your tools. Cape, neck strips, and cleanup gear matter, too—now, here’s how to put it all to work.
Key Takeaways
- Clippers with adjustable lever and guards (#0.5–#4) for fast debulking and clean fades on sides and top.
- Precision trimmers (narrow and wide blades) for crisp hairlines, around ears, and detailing.
- Foil shaver (single or double) to achieve ultra-close, skin-level sides and nape.
- Shears and thinning scissors with combs (fade, clipper, wide-tooth) for top shaping and seamless blending.
- Cleaning and sanitizing supplies: duster brush, alcohol wipes, lint roller, handheld vacuum, and spray bottle.
Essential Clippers and Guard Sizes
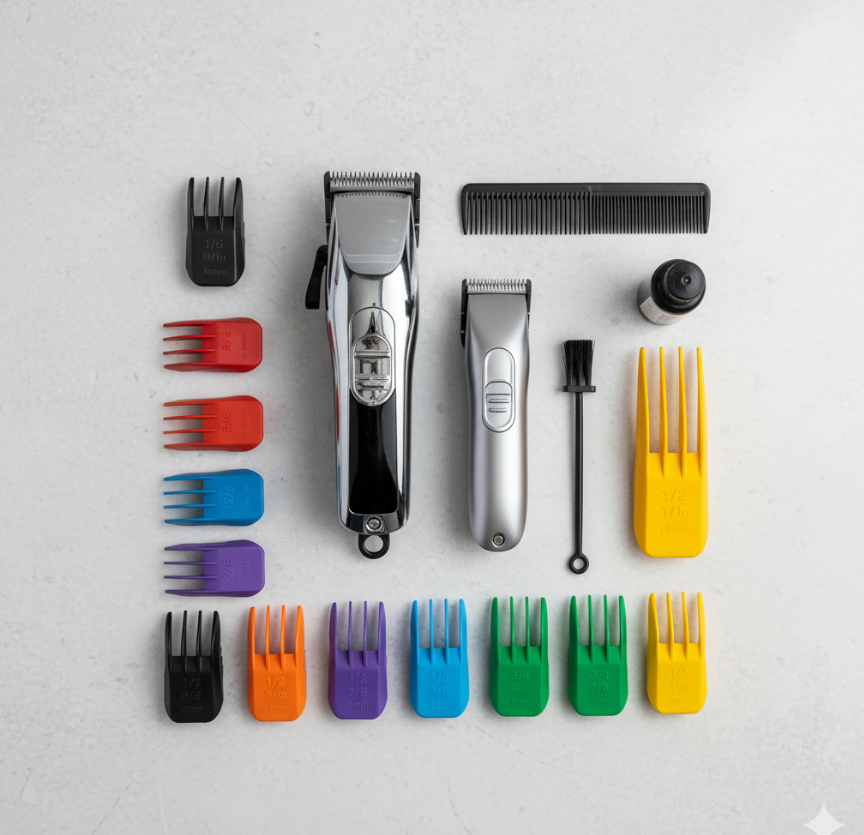
Two tools make or break a high and tight: a reliable clipper and the right guards. You want a corded or cordless workhorse with steady torque, sharp blades, and solid ergonomics.
Compare clipper types: rotary motors chew through dense hair; magnetic motors run fast and crisp; pivot motors balance power and heat. Keep blades zero-gap optional but smooth to prevent bites.
Dial in guard lengths to map the fade. For the sides, #0.5–#1 keeps it tight; #1.5–#2 adds a touch of coverage. Shift with #3–#4 if you’re leaving weight up top.
Use blade levers to split steps between guards for cleaner blends. Oil before each session, brush out hair, and swap dull blades. With the right setup, you cut faster and cleaner.
Precision Trimmers for Clean Edges
You’ll want a precision trimmer with a narrow blade for tight corners and a wider blade for fast, straight lines.
Check that it supports adjustable guards so you can bump from skin-close edging to a subtle taper without swapping tools.
Keep the blades zero-gapped (if the model allows) and you’ll get razor-sharp outlines without irritation.
Blade Width Matters
Blade width dictates how clean your lines look and how confidently you work around tight corners. Go narrow—around 28–32 mm—when you’re edging hairlines, arches, and the nape; the slim profile lets you see your work and pivot without nicking.
Wider blades—35–40+ mm—clear bulk faster and keep long runs straight, but they’re clumsier near curves.
Match blade types to tasks: T-blades excel at detailing and reaching around ears; square blades keep edges boxy and tight. Zero-gap if you want razor-close definition, but test on your wrist first to avoid bite.
Keep your cutting angles shallow along the temples and steeper at the occipital ridge to track the head’s contour. Oil before each pass, brush out debris, and check alignment after any drop.
Adjustable Guard Options
Guard adjustability is your cheat code for crisp edges without overcutting. With precision trimmers, you’ll switch guard size options on the fly to chase lines, blend temples, and keep the perimeter tight. The adjustable guard benefits are speed, control, and fewer tool swaps.
Dial down a click to clean bulk near the parietal ridge; bump up to protect corners around the widow’s peak.
Work in short passes. Start with a 1.5–2mm setting to map your outline, then drop to 0.8–1mm to sharpen the edge without digging. Use the trimmer’s corner for detail around the ear curve.
If your lever has half-steps, use them to feather stubble into skin. Keep blades zero-gapped but not biting, oil lightly, and test tension so the guard tracks smoothly.
Foil Shavers for Ultra-Close Sides
When you want glass-smooth sides, pick your weapon: single-foil for tight spots and contouring, double-foil for faster bulk clearing.
Use light, overlapping strokes with the grain first, then against for the closest finish.
To prevent irritation, stretch the skin, keep foils clean, and finish with an alcohol-free, fragrance-free post-shave soother.
Single vs. Double Foil
Though both get you skin-close, single- and double-foil shavers behave differently on the sides. You’ll feel it in speed, control, and how clean the blend looks under bright light.
Think of single foil benefits as precision: it’s lighter, easier to steer around ear curves, and great for detailing the temple-to-parietal arc.
Double foil advantages mean coverage: two cutters mow faster, flatten cowlicks, and erase shadow in fewer passes.
- Picture tight ear notches: a single foil hugs contours, nicks fewer edges, and traces crisp lines.
- Visualize wide fades: a double foil clears bulk fast, keeping strokes parallel and efficient.
- Imagine stubborn grain: double foil chews through it without stalling.
- See surgical touch-ups: single foil feathers shift lines and polishes the ridge.
Skin Irritation Prevention
You’ve picked your foil—single for finesse, double for speed—now protect the skin you’re shaving paper-thin.
Prep with a lukewarm cleanse, then mist witch hazel or a light pre-shave spray to tighten and degrease. Stretch the skin with your off-hand; run the shaver with grain first, then across, never dry-scrub one spot. Use short, overlapping passes; lift off before heat builds.
Swap or sanitize foils often—dull screens snag, hot heads inflame.
Keep tension minimal at the temple and behind the ear; those zones flare fast. Rinse cool, pat dry, then calm everything down.
Reach for alcohol-free aftershave balms, hyaluronic or aloe-based soothing lotions, and a dab of 1% hydrocortisone if you’re rash-prone. Finish with a non-comedogenic SPF on exposed fades.
Scissors and Blending Tools
A solid high and tight needs sharp shears and smart blending tools to nail clean lines and seamless fades. You’ll reach for the right scissor types first: 5.5–6 inch cutting shears for precision, longer 6.5–7 inch blades for quick debulking, and 30–40 tooth thinning shears for soft gradations.
Keep tension consistent and points clean; micro-serrated edges help grip coarse hair.
Use blending techniques that control weight and blur demarcation without chew marks. Work over-comb with shallow point cutting, then refine with thinning shears in a scooping motion—not chomp-and-stop.
- Stainless cutting shears flashing under bright light.
- Thinning shears nibbling bulk like careful raindrops.
- Section edges melting as you feather cut.
- A tight crown, taper ghosting into skin.
Combs, Sectioning Clips, and Mirrors
Precision starts at the comb: choose a rigid, heat-resistant fade comb for tight skin work, a carbon clipper comb for over-comb control, and a wide-tooth rake to move dense top sections without snagging.
Dial in comb selection techniques: contrast color against hair for visibility, pick fine teeth to tension stubble, and keep a flexible tail comb nearby for parting speed.
Lock sections with metal spring clips; plastic can slip on coarse hair. Angle clips parallel to growth, not perpendicular, to avoid creases.
These clip usage tips keep your guide clean and repeatable.
Mirrors matter. Use a large front mirror to set your baseline, then a handheld plus a wall mirror to check the horseshoe and nape.
Cross-check symmetry under bright, shadow-free light.
Maintenance: Disinfectants, Oils, and Cleaning Brushes

Even before the first pass, treat maintenance like a ritual: disinfect, dust, oil, repeat. Keep clippers sharp, guards clean, and trimmers humming by dialing in your care kit.
Know your disinfectant types—sprays for quick turnarounds, immersion for deep soaks, wipes for handles and switches. Hit metal with a fast-evaporating spray between clients, then brush out micro-debris so teeth don’t bind.
- 1) A stiff nylon cleaning brush whisking hair from blades and vents.
- 2) A labeled spray bottle misting hospital-grade disinfectant across steel.
- 3) A precision oiler laying a micro-drop on heel, toe, and pivot points.
- 4) A soft detailing brush chasing dust from seams and dials.
Let oil benefits work: lower friction, cooler runs, quieter cuts, longer blade life.
Capes, Neck Strips, and Cleanup Supplies
Two layers separate clean work from itchy chaos: a full-coverage cape and a fresh neck strip. You’ll lock down loose hair, protect skin, and keep your fade lines honest. Know your capes types: nylon for lightweight glide, polyester for durability, and waterproof for rinse-and-go stations. Pair them with neck strip benefits: hygiene barrier, tighter seal, and easier cleanup. Fasten the cape snug, apply the strip below the collar, then clipper without snag.
| Item | Purpose | Pro tip |
|---|---|---|
| Cape (nylon) | Hair deflection | Anti-static helps guards slide |
| Neck strips | Hygiene seal | Overlap for sweat control |
| Duster brush | Remove clippings | Sweep downward, then across |
| Lint roller | Final pass | Catch micro-clippings fast |
Finish with alcohol wipes, a handheld vacuum, and a spray bottle to reset the station.
Conclusion
You’ve got the playbook: dialed-in clippers with key guards, sharp trimmers for crisp lines, and a foil shaver to glass the sides. Keep shears ready for blending, combs and clips for control, and mirrors to check symmetry. Oil and disinfect your tools, brush out debris, and swap blades when they drag. Drape a cape, lock in neck strips, and tidy with a duster and lint roller. With this kit, you’ll knock out clean, consistent high-and-tights.