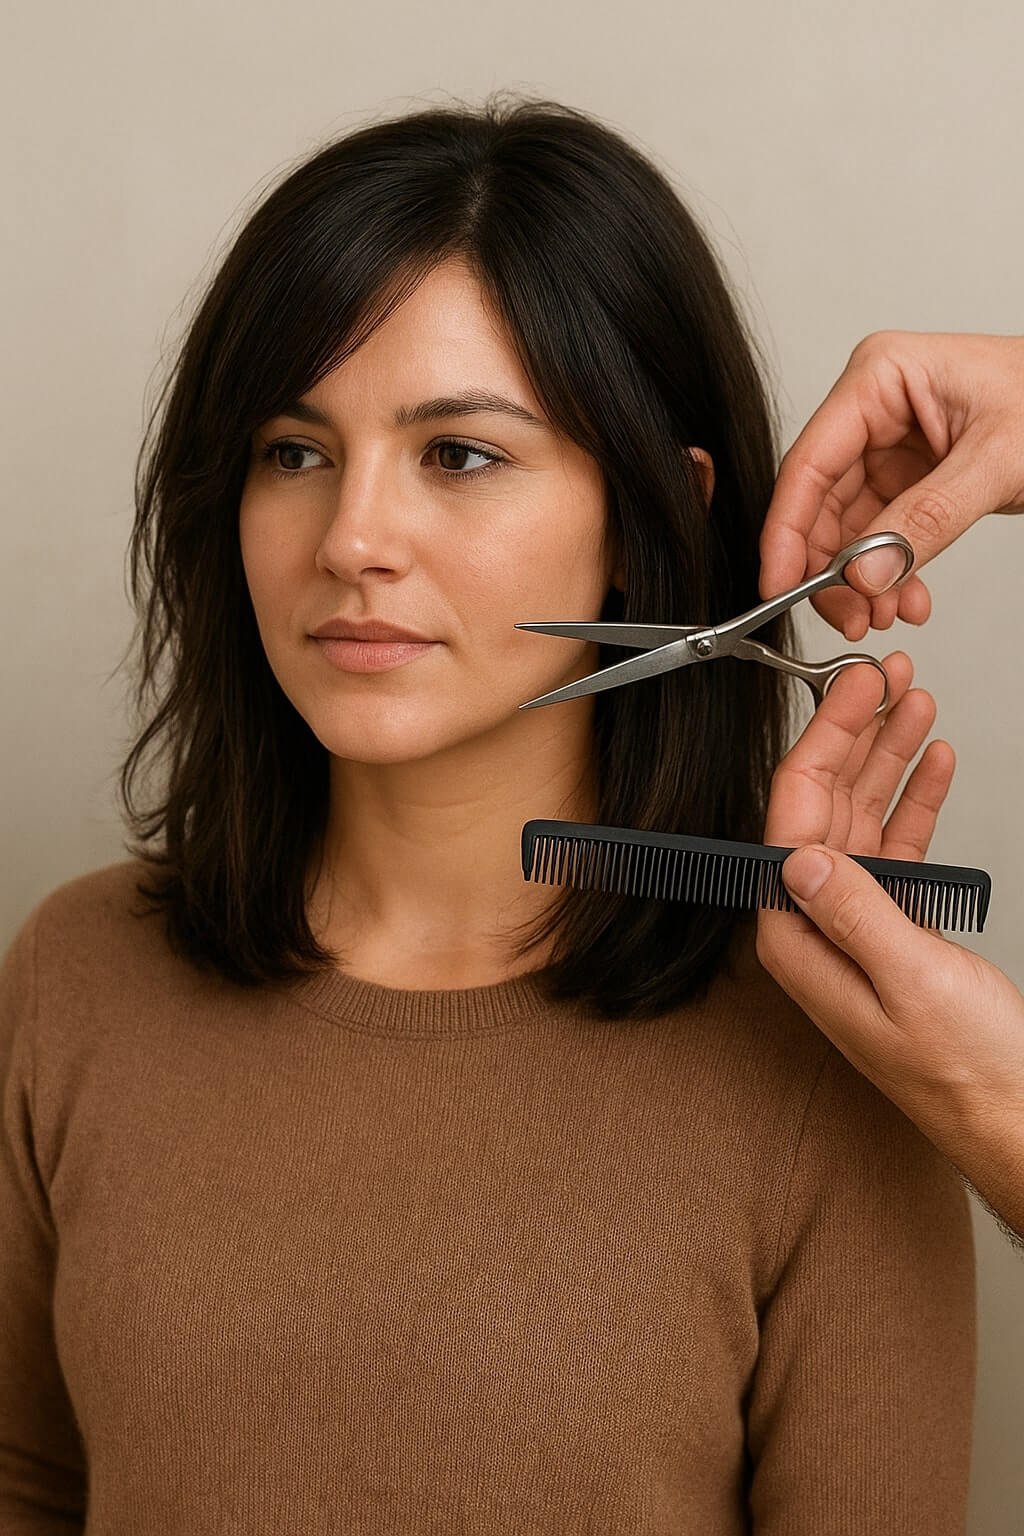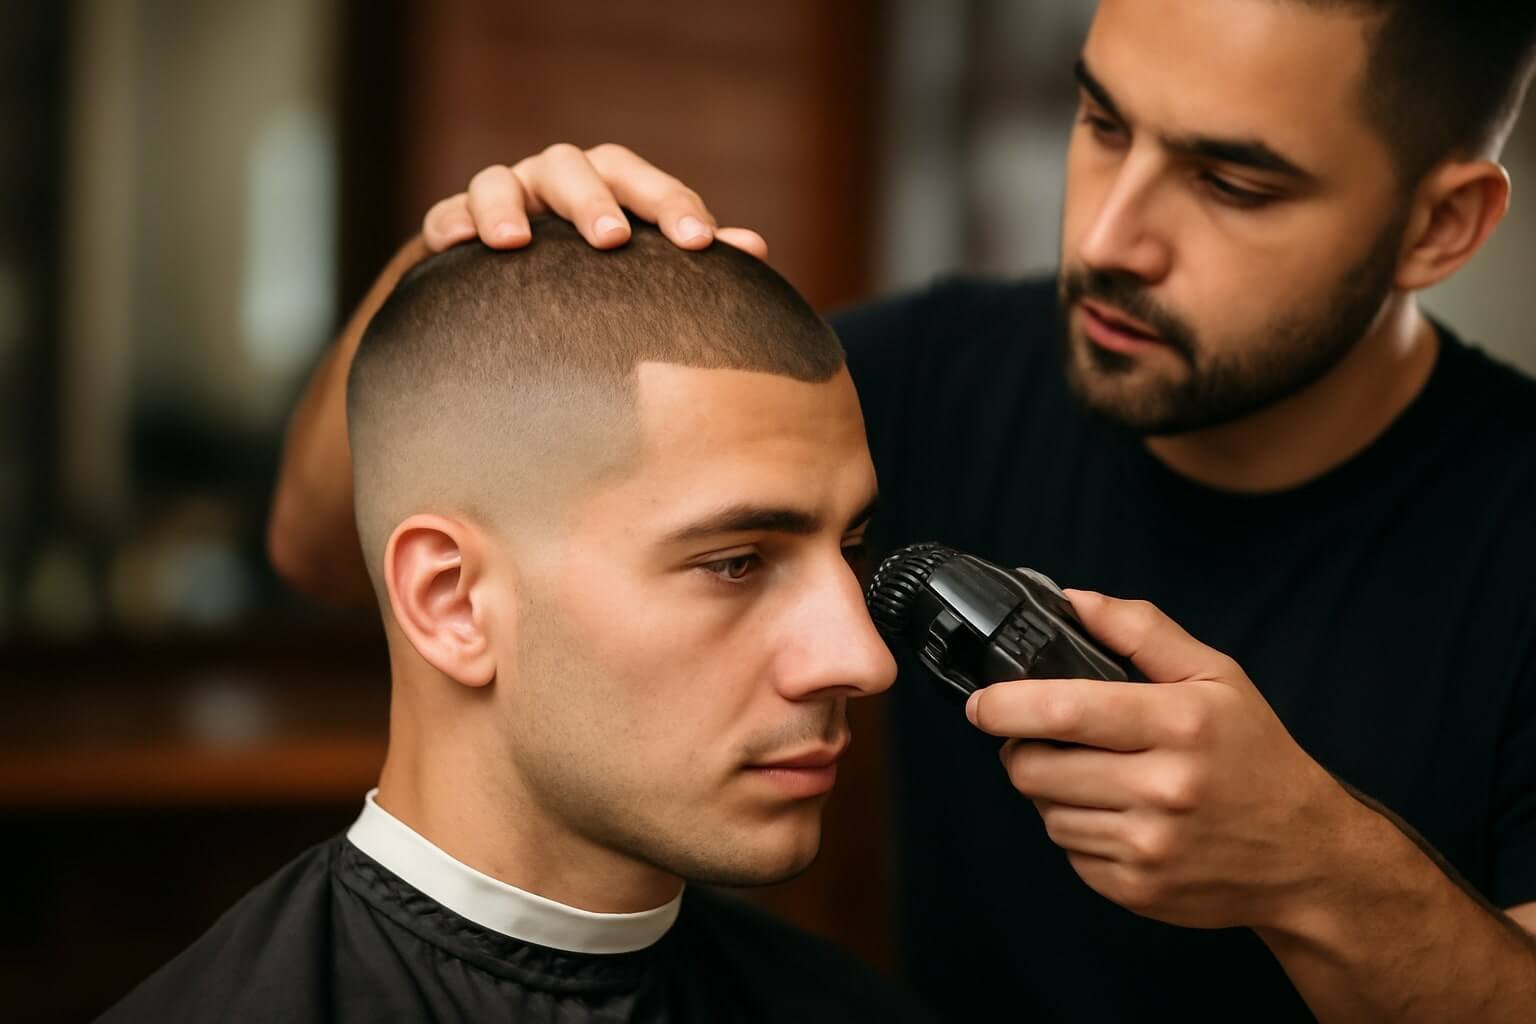
You’re about to master a buzz cut low fade by treating it like a controlled process, not a guess. You’ll pick the right guards, map your head shape, and set a clean low fade line just above the ear. With disciplined strokes, tight lever control, and crisp edging, you’ll create a smooth gradient and a sharp lineup. You’ll also learn aftercare and fix common mistakes before they happen—but only if you set up correctly first.
Key Takeaways
- Prepare tools, map a low fade baseline around the parietal ridge, and verify guard sizes, lever function, and lighting before cutting.
- Choose guards progressively (#3–#4 top, down to #2, #1, with half guards) and control fade height within the lower 0.5–1 inch.
- Establish a tight bottom guideline with a closed lever, then open incrementally and switch guards to blend using short, curved strokes.
- Detail the hairline, corners, and temple points with a trimmer and foil shaver, maintaining symmetry without pushing the line higher.
- Transition into the beard with stepped guards, define cheek and neckline lightly, then finish with alcohol-free aftercare and SPF.
Tools and Products You’ll Need
Before you touch the clippers, assemble the essentials: high-quality cordless clippers with adjustable guards (0.5–3), a foil shaver for a skin-tight finish, a precision trimmer for edging, and a taper lever for seamless blending.
Keep your hair clippers zero-gapped and oiled; clean blades reduce heat and snagging. Add fade combs in multiple widths for controlled elevation and consistent tension.
Zero-gap and oil your clippers; clean blades glide cooler. Add varied fade combs for elevation and consistent tension.
Use a neck duster, clipper brush, and disinfectant spray to maintain hygiene between passes. Secure a handheld mirror for checking symmetry, and bright, shadow-free lighting to reveal lines and bulk.
Apply a lightweight pre-shave oil before foiling to minimize irritation. Finish with an alcohol-free antiseptic and a matte styling powder to reduce shine and enhance the low fade’s structure.
Choosing the Right Guard Lengths
With your tools prepped and zero-gapped, the next variable is guard selection to set length, weight, and flow. Start by defining your top length, then map down in predictable increments. For most buzz cuts, a #3 or #4 anchors the crown; step to #2, then #1, reserving open/closed lever adjustments to micro-taper shifts.
Use half guards (1.5, 2.5) to prevent jumps and maintain symmetry. Prioritize guard length selection based on hair density and growth patterns. Coarse or dark hair tolerates tighter steps; fine hair needs gentler drops.
Execute fade depth determination by assigning your shortest guard to the lowest zone you’ll blend into, then build upward with consistent overlap passes. Keep strokes vertical, pressure light, and always erase lines with the next shorter guard, lever open.
Understanding Low Fade Heights
Although guidelines vary by head shape and hair density, a low fade typically starts its shift one finger above the ear and along the occipital, keeping the shortest length confined to the lower 0.5–1 inch of the perimeter.
You’re controlling height to preserve weight through the temple and crown, so the silhouette stays grounded. Think of height as the vertical travel from skin to your guard baseline; the lower the travel, the cleaner the edge, the fuller the top reads.
Match low fade heights to hair textures and growth patterns. Coarse, dense hair tolerates a slightly taller low fade without exposing scalp. Fine or straight hair benefits from a tighter, shorter alteration.
Across fade styles, keep symmetry consistent bilaterally and taper the nape subtly to avoid a boxed, heavy rear profile.
Pre-Cut Prep and Sectioning
Before you start, assemble your tools and confirm clipper guards from zero to #3 are clean, oiled, and clicking securely.
Map the head: mark your low fade baseline around the parietal ridge and temple points, then note whorls, cowlicks, and growth patterns.
Section with clips or comb control so your guideline lines stay crisp and your shifts track symmetrically.
Tools and Clipper Guards
Even if you’ve cut hair before, the buzz cut low fade demands specific tools and a clear guard plan. Choose reliable clipper types—corded for constant torque, cordless for mobility. Prioritize steel blades with zero-gap capability and a taper lever. Use guards that lock firmly; verify sizing accuracy before you start.
Consider guard materials—rigid polymer resists flex, while metal-reinforced guards track tighter against the scalp.
- Clippers: High-torque motor, adjustable lever, sharp blades; keep a zero-gap trimmer for detailing edges and bulk removal channels.
- Guards: Full set from #0.5 to #4; include half sizes for smooth shifts; confirm tight fit with your brand.
- Comb and brush: Lift hair uniformly; clear debris between passes.
- Maintenance: Disinfect, oil blades, align teeth, and test guards for wobble before every cut.
Hair Mapping and Lines
Once your tools are dialed, map the head to control symmetry and fade flow.
Stand the client upright, comb hair with the grain to read hair growth patterns, cowlicks, and density shifts. Identify the natural recession, parietal ridge, and occipital bone; these landmarks anchor your guides.
Set three lines: baseline, midline, and top guideline. The baseline sits just above the ear hinge for a low fade; mirror it around the head. The midline marks your shift zone. The top guideline protects the buzz length on top per style preferences.
Draw with a trimmer or pencil comb: keep lines level to the floor at the temple, then slightly rise toward the crown to avoid dark spots.
Cross-check from multiple angles. Lock references with photos if needed.
Creating the Initial Buzz Length
A consistent starting length anchors the entire fade, so set your clipper with a guard that matches your target buzz (commonly #2 or #3 for about 6–10 mm). Establish the buzz length uniformly before any tapering. Keep strokes controlled, overlap passes, and track growth patterns to prevent patchiness. Your initial cut should be even, clean, and repeatable.
Anchor your fade: set a uniform buzz length, overlap passes, and follow growth patterns.
- Wash, dry, and detangle. Dry hair gives accurate height, so your buzz length won’t balloon when it settles.
- Start at the crown, move with the grain, and maintain steady tension on the scalp; overlap passes by 50% for consistency.
- Cross-check against the grain lightly to catch missed strands without shortening beyond your set length.
- Edge around ears, nape, and hairline with the same guard; refine corners using short, precise strokes.
Building the Low Fade Guideline
While the base is uniform, the fade begins with a mapped guideline that sits just above the ear and hugs the perimeter around the head. Use a closed guard (0 or 0.5) to score a clean, continuous line. Keep the head level, mirror your angle on both sides, and anchor the curve at the mastoid for guideline accuracy. Keep the line low—no higher than one finger above the top of the ear.
- Work in small sections, then connect them.
- Use the corner of the clipper for tight curves.
- Recheck symmetry from the front and back.
| Step | Purpose |
|---|---|
| Mark temple to mastoid | Locks elevation |
| Trace nape arc | Maintains perimeter flow |
| Connect sides at occipital | Guarantees symmetry |
This disciplined mapping underpins all fade techniques without encroaching on blending.
Blending and Tapering Techniques
With the low guideline locked in, start erasing weight from the bottom up using controlled guard progressions. Anchor with a closed lever, then open incrementally to soften the step. Keep your strokes short and consistent, moving with the head’s curvature.
Switch guards methodically to refine the shift while preserving the fade’s low placement. Use deliberate blending techniques and clean tapering methods to maintain symmetry.
- Work the baseline: closed 0 to open 0, then 0.5, flicking out at the band’s top to lift bulk without creating new lines.
- Mid-zone polish: 1 closed to 1 open, using diagonal crosshatching for seamless diffusion.
- Parietal refinement: 1.5 to 2 guards, lever open, light pressure to avoid shelves.
- Neck and temple taper: lever play plus clipper-over-comb to melt density cleanly.
Lineup and Detailing for a Crisp Finish
You’ll start by defining the hairline with zero-gap trimmers, keeping corners square or slightly rounded to suit head shape.
Next, sharpen and balance the temple points, mirroring angles on both sides for symmetry.
Finish with a precision beard fade, using a soft C-cup and guarded clipper work to blend sideburns into the fade without harsh steps.
Defining the Hairline
Even before the last guard comes off, define the hairline so the fade reads clean and intentional. Map your guide with a trimmer, not a shaver, so you can correct without digging. Read natural growth, cowlicks, and recession to choose hairline shapes that suit the head form. Prioritize hairline symmetry: balance left and right by mirroring reference points—mid-forehead, brow peaks, and corners.
- Prep: Dry the front, comb forward, and dust talc for contrast. Plant your elbow, stabilize your wrist.
- Front line: Tap in a shallow arc or straight bar; keep pressure feather-light to avoid overcutting.
- Corners: Square or softly rounded, match density and forehead width.
- Cleanup: Detail stray stubble with a foil shaver outside the line; never push the line higher.
Enhancing Temple Points
Two clean temple points anchor the fade and make the hairline read sharp. Map your points first: visualize a clean chevron or soft arc that mirrors brow angle and forehead width.
Use a trimmer with zero-gap precision to outline; keep strokes short and parallel to growth to prevent overcarving. For temple point shaping, prioritize symmetry—measure distance from the corner of the eye to each point and match depths.
Switch to a foil shaver to clear stubble outside the line, then feather inward with the corners of the blade for micro-tapering.
Apply fade enhancement techniques by ghosting the perimeter: lightly debulk with a #0.5 guard under the points, then blend with open lever.
Finish with a razor touch-up and alcohol-free astringent to seal edges and minimize irritation.
Precision Beard Transition
A seamless beard shift locks the buzz cut low fade into a unified frame, so treat the cheek line, mustache breaks, and neckline as connected contours.
You’re sculpting beard shape to echo your taper’s angle, ensuring clean fade integration from sideburn to jaw.
- Map lines dry. Mark the highest cheek point and natural neckline curve. Align sideburn width with the fade’s darkest band for an uninterrupted gradient.
- Set guards: 2 with-the-grain on cheeks, 1.5 at mid-jaw, 1 at undercarriage. Feather upward with flicks to erase steps.
- Switch to trimmers. Define cheek arcs and mustache notches with light taps; detail corners before long strokes.
- Shave below the line. Stretch skin, use short, downward passes. Finish with cold towel and alcohol-free toner.
Aftercare and Maintenance Routine
Although the cut is low-maintenance, treat aftercare like a checklist to keep the fade sharp and scalp healthy. Cleanse daily with a gentle, sulfate-free wash to clear sweat and oil from short stubble and skin. Hydrate with a lightweight, non-comedogenic moisturizer; add SPF 30+ every morning. Use alcohol-free tonic post-shower to soothe and reduce irritation. Define your maintenance frequency: edge outlines every 5–7 days, full fade refresh every 2–3 weeks. Keep clippers brushed, oiled, and stored dry to preserve blade alignment. Rotate aftercare products seasonally—richer in winter, lighter in summer.
| Task | Tool | Interval |
|---|---|---|
| Cleanse scalp | Mild wash | Daily |
| Moisturize + SPF | Lightweight lotion | Daily |
| Soothe/tonic | Alcohol-free tonic | Post-shower |
| Edge outlines | Trimmer/razor | 5–7 days |
| Full fade refresh | Barber session | 2–3 weeks |
Troubleshooting Common Mistakes and Pro Tips
With maintenance locked in, address the snags that blunt a clean buzz cut low fade. You’ll avoid common pitfalls by diagnosing edge blur, bulk shadows, and patchiness before they spread. Use expert advice to correct technique, tool choice, and sequencing so your fade reads crisp from every angle.
- Map the fade: establish your low baseline with a trimmer, then climb guards methodically (0, 0.5, 1, 2). Overlap passes in crosshatch to erase steps.
- Control corners: pivot the clipper at temples and mastoid. Use the blade’s last third to avoid over-removal and punchy bite marks.
- Clean lines last: detail the perimeter after blending. Feather the nape; never square too high.
- Fix shadows: deploy a foil shaver under the baseline, then re-soften with a 0.5 guard to melt micro-bands.
Conclusion
You’ve now got the blueprint to execute a clean buzz cut low fade with precision. Prep your tools, map the head, choose guards strategically, and set a consistent baseline length. Build the fade low and tight, blend with short, controlled strokes, and lock in symmetry with a sharp lineup. Finish with aftercare to maintain texture and sheen. If imperfections pop up, troubleshoot methodically—adjust guards, refine your lever work, and recheck balance. Repeat the process, and your results will stay razor-precise.