
Tiling your bathroom can seem intimidating at first, but with the right preparation, tools, and guidance, it’s a highly achievable DIY project. Whether you’re updating your floors, shower walls, or backsplash, this step-by-step guide will walk you through everything from planning to the final polish. Learn how to install bathroom tiles like a pro and transform your space—without the need to hire one.
Why DIY Bathroom Tile Installation?
Doing it yourself can save money, allow for custom creativity, and give you a serious sense of accomplishment. Most importantly, it lets you learn a valuable skill that can be used across other renovation projects. But preparation is key.
Tools & Materials You’ll Need
Before you begin, gather the following essentials:
- Tiles (ceramic, porcelain, glass, etc.)
- Tile adhesive (thin-set mortar)
- Grout
- Notched trowel
- Tile spacers
- Tile cutter or wet saw
- Level
- Rubber grout float
- Sponge and bucket
- Tape measure and pencil
- Safety gear (gloves, goggles, knee pads)
Step-by-Step Bathroom Tile Installation Process
Step 1: Plan the Layout
Start by measuring the area you want to tile and deciding on a tile pattern. Sketch the layout or use tile layout software. Dry-lay some tiles on the floor to visualise spacing and cuts. Always begin tiling from the centre to ensure symmetry and balance.
Step 2: Prepare the Surface
Clean the surface thoroughly. It should be smooth, dry, and free of dust. For floors or wet areas, use a waterproof backer board like cement board for extra protection. Apply a waterproof membrane if necessary.
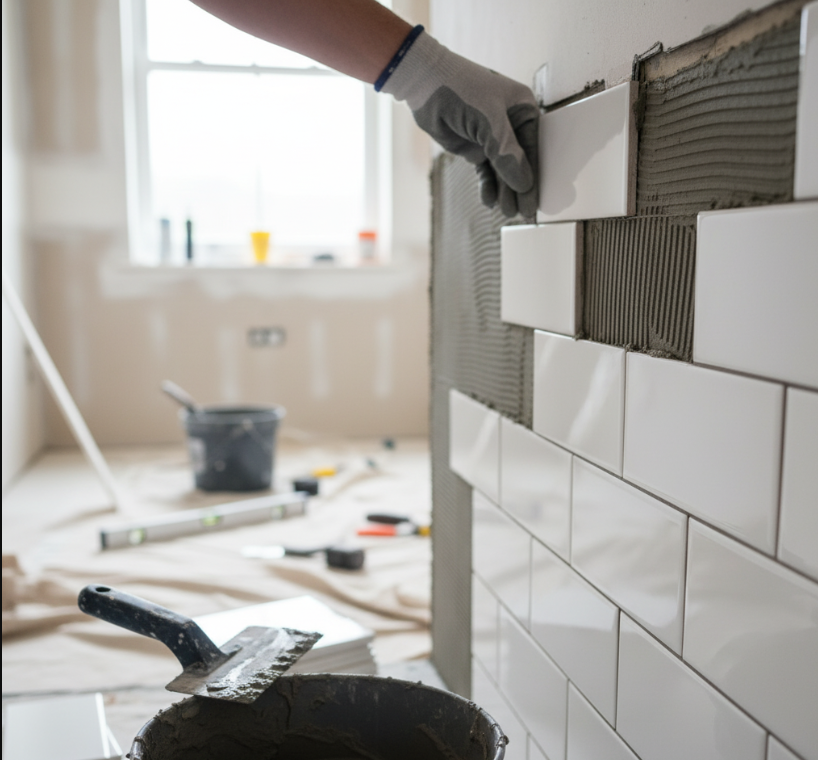
Step 3: Mix and Apply the Adhesive
Use a notched trowel to spread tile adhesive evenly on a small section of the surface. Hold the trowel at a 45-degree angle to create ridges—this helps the tile stick better.
Step 4: Lay the Tiles
Press each tile firmly into the adhesive. Use tile spacers to maintain even grout lines. Check alignment with a level frequently. Work in small sections so the adhesive doesn’t dry out before you place the tile.
Step 5: Cut Tiles to Fit
Use a tile cutter for straight cuts or a wet saw for curved/angled cuts. Carefully measure the gaps near walls, corners, and fixtures to ensure precise fitting.
Step 6: Let It Set
Allow the adhesive to cure for 24 hours. Avoid walking on or disturbing the tiles during this time.
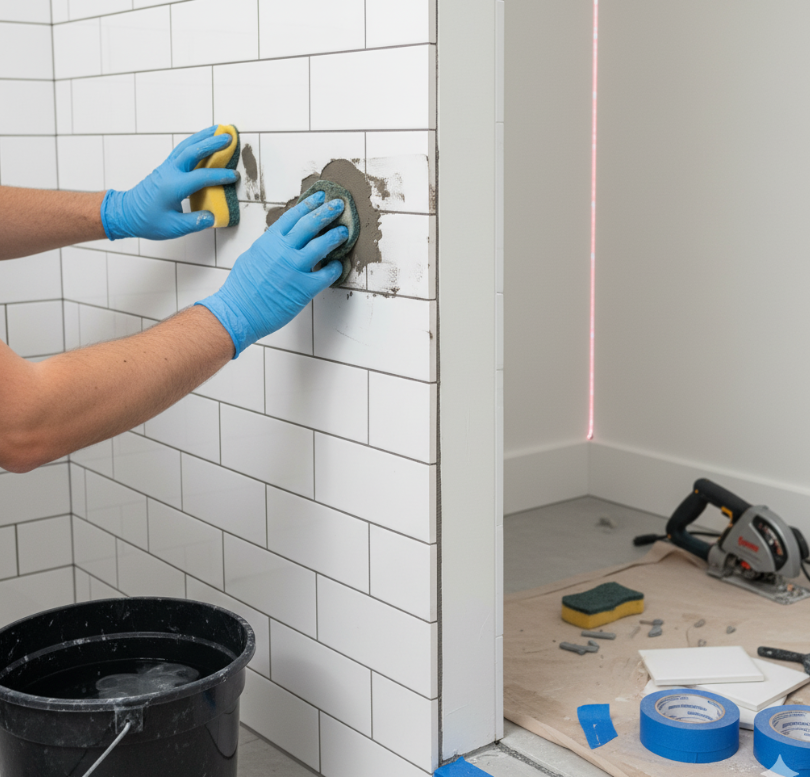
Step 7: Apply Grout
Remove tile spacers and use a rubber float to push grout into the gaps between the tiles. Hold the float at a 45-degree angle and work diagonally across the joints.
Step 8: Clean Excess Grout
After about 15–30 minutes, wipe off excess grout with a damp sponge. Rinse the sponge frequently and be gentle to avoid pulling grout out of the lines.
Step 9: Final Polish and Sealing
Once the grout has dried (usually after 24 hours), polish the tiles with a clean, dry cloth. Apply a grout sealer to prevent stains and moisture penetration.
Tips for a Successful Bathroom Tiling Project
- Always dry-fit tiles before setting them to reduce cutting errors.
- Use a laser level for perfect alignment, especially on walls.
- Ventilate the space well when working with adhesives and grout.
- Seal porous tiles (like natural stone) before grouting to avoid staining.
Common Mistakes to Avoid
- Not prepping the surface properly.
- Applying too much adhesive at once.
- Forgetting to use spacers or seal grout.
- Walking on tiles before they’ve set.
FAQs About DIY Bathroom Tile Installation
How long does a DIY bathroom tile job take?
Can I tile over existing tiles?
What’s the best tile type for bathrooms?
How do I calculate how many tiles I need?
Should I use sanded or unsanded grout?
Final Thoughts
Installing bathroom tiles yourself isn’t just about saving money—it’s about personalising your space with care and creativity. With the steps above and some patience, even a beginner can complete a stunning tile installation.


