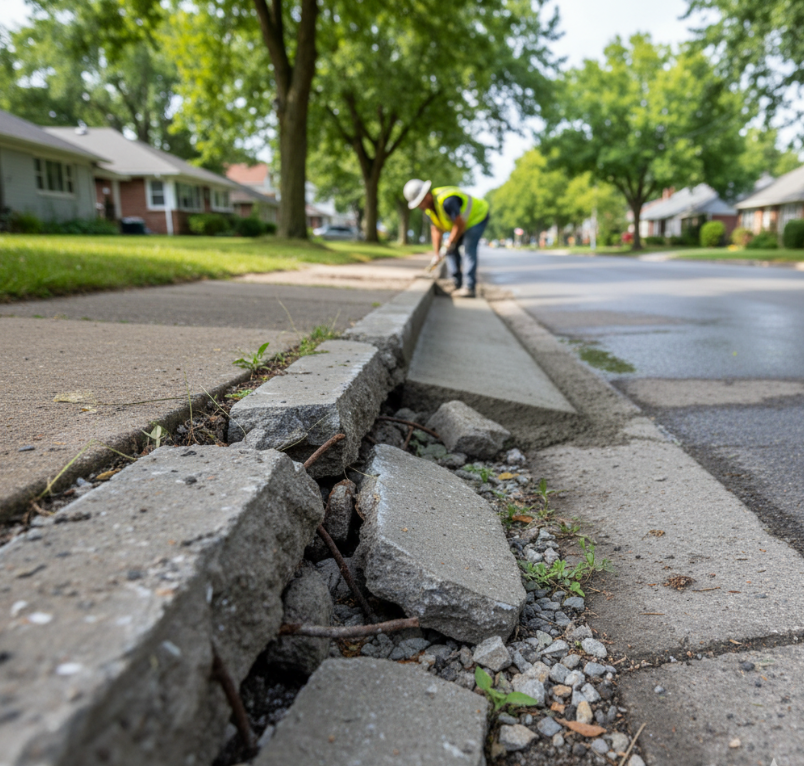
Cracked, chipped, or crumbling curbs don’t just reduce your property’s curb appeal—they can also pose safety risks and lead to costly damage if ignored. Thankfully, with modern DIY curb repair kits, homeowners and property managers can restore their curbs quickly and affordably without hiring contractors.
In this comprehensive guide, we’ll explore the top-rated DIY curb repair kits available in 2025, compare features, and answer your most frequently asked questions. Whether you’re dealing with concrete, asphalt, or decorative curbs, this article will help you choose the best solution to fix them today.
Why Repairing Damaged Curbs Matters
Before diving into product comparisons, it’s essential to understand why curb repair is necessary:
- Safety: Damaged curbs can be trip hazards for pedestrians and vehicles.
- Aesthetics: Cracked curbs diminish the visual appeal of your home or business exterior.
- Water Drainage: Broken edges can cause poor water runoff, leading to pooling or erosion.
- Property Value: Well-maintained curbs reflect a well-cared-for property.
Features to Look for in a Quality Curb Repair Kit
When choosing a DIY curb repair kit, look for these key features:
- Strong Adhesion: The product should bond effectively with existing concrete or asphalt.
- Weather Resistance: UV stability and freeze-thaw durability are crucial for long-term performance.
- Ease of Application: Prefer kits with pre-mixed compounds or user-friendly application tools.
- Curing Time: Faster setting times allow quicker project turnaround.
- Finish Matching: Some kits allow colour tinting to match existing curb colour.
Best DIY Curb Repair Kits of 2025
1. Quikrete Concrete Repair Kit
Best For: Quick patching of small curb cracks
- Type: Acrylic latex repair compound
- Curing Time: 2–4 hours
- Application Method: Caulk gun
- Pros: Affordable, dries quickly, excellent adhesion
- Cons: Not suitable for large-scale repairs
2. Rust-Oleum EpoxyShield Patch & Repair Kit
Best For: Heavy-duty concrete curb damage
- Type: Epoxy resin compound
- Curing Time: 8 hours
- Application Method: Trowel
- Pros: Industrial strength, excellent for deep gouges
- Cons: Higher cost, needs proper surface prep
3. SikaQuick Patch Repair Mortar
Best For: Vertical curb edges and corners
- Type: Rapid-setting cementitious mortar
- Curing Time: 1 hour
- Application Method: Trowel or spatula
- Pros: Great for vertical applications, weather resistant
- Cons: Needs mixing, not pre-blended
4. Dap Ready-Mixed Concrete Patch
Best For: Cosmetic repairs
- Type: Latex-based
- Curing Time: 24 hours
- Application Method: Putty knife
- Pros: No mixing needed, smooth finish
- Cons: Not suitable for structural repairs
5. Road Rescue Asphalt Repair
Best For: Asphalt curbs and edges
- Type: Aggregate-based
- Curing Time: Traffic-ready immediately
- Application Method: Pour and tamp
- Pros: No curing delay, works in wet or dry conditions
- Cons: Best for asphalt only
Step-by-Step Guide to Using a DIY Curb Repair Kit
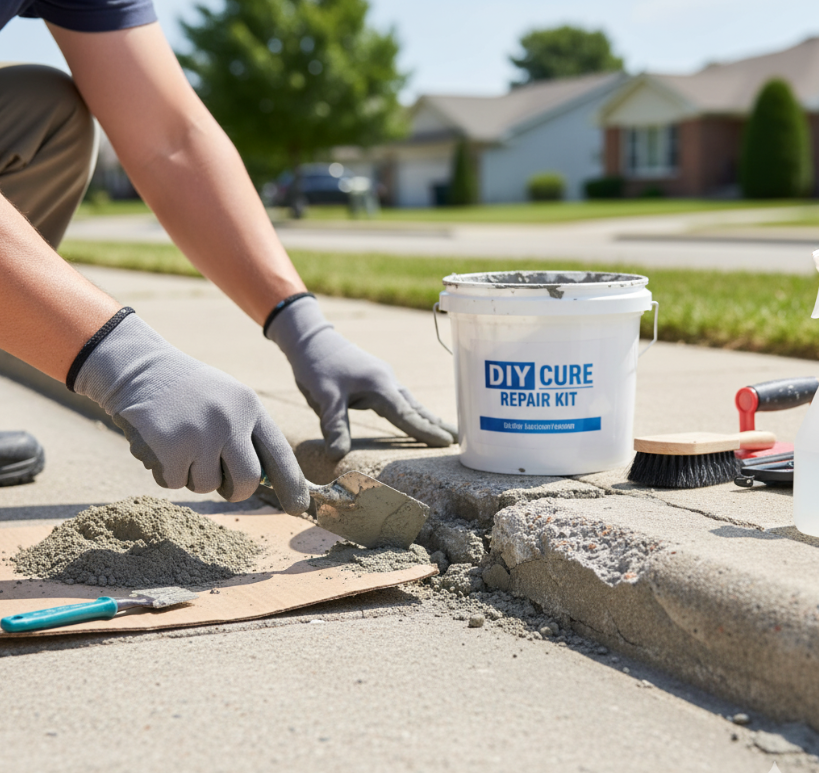
- Clean the Surface: Remove all dirt, debris, and loose materials using a wire brush or pressure washer.
- Prep the Area: If needed, use bonding agents for better adhesion.
- Mix (If Required): Some kits need mixing. Follow the instructions precisely.
- Apply the Compound: Use the right tools—caulk gun, trowel, or putty knife—to fill and shape the damage.
- Smooth and Shape: Feather edges and match the curb’s profile.
- Let it cure: Avoid traffic or moisture until the repair has fully set.
Maintenance Tips for Repaired Curbs
- Avoid heavy traffic for at least 24 hours.
- Reseal concrete every 2–3 years.
- Keep the area clear of de-icing salts in winter.
- Check for recurring cracks and act early.
Frequently Asked Questions (FAQs)
1. How long does a curb repair typically last?
2. Can I repair a curb during winter or in wet conditions?
3. Is it better to resurface or replace a curb?
4. Can these kits be used on decorative or stamped curbs?
5. Do I need professional tools?
Final Thoughts
Choosing the right DIY curb repair kit can save you hundreds of dollars and extend the life of your pavement. With proper application and care, your curbs can look brand new again—safely and affordably. Be sure to assess the extent of the damage and choose a kit that matches your curb material and local climate.
If you’re ready to take control of your property’s appearance, there’s no better time than today to fix those damaged curbs.